I recently discovered that it’s possible to combine any domain that you own with your Gmail account and a free MailGun account to get a free custom domain email address!
When you’re done following the below instructions you’ll be able to send and receive emails addressed to you@yourdomain.com directly from your Gmail inbox.
Step 1 - Buy a domain

Okay, so you still have to pay to own your domain, but the rest is free. And if you want a custom domain email address, then chances are you’re interested in your professional reputation. Owning your own domain is a good idea even if you don’t plan to start your own sure just yet. I held off on it a couple years and that was enough for a law student to grab zainrizvi.com -_-
I prefer to buy my domains through namecheap.com, though pretty much any company would work. Use whatever you like, but don’t let the decision of which site to use to stop you from buying your domain! (Use namecheap.com if you’re uncertain)
Step 2 - Sign up for a mailgun.com account

Edit: Mailgun now charges for mail forwarding, but at the bottom of this email I've listed other services which let you do the same thing for free. Just replace Mailgun with your chosen service.
This is the secret sauce. We’ll use Mailgun to forward any email sent to your domain straight to your Gmail inbox (umm…you should sign up for Gmail too if you haven’t already)
Go to their site at http://www.mailgun.com and sign up. It’s free (even if they want you to give them your credit card)
Step 3 - Register your domain with Mailgun
Within MailGun find the option to add a new domain (it’s in Sending -> Domains -> Add New Domain). Chances are they’ll have setup their new user onboarding to guide you through that exact process. Follow the instructions on the page to setup your domain.
While MailGun does require a credit card before you can add your domain, they won’t charge you anything if you follow the steps in this blog.
At some point they will ask you to update your domain’s DNS records. It seems scary but they walk you through the worst of it.
Then wait for MailGun to confirm that everything is setup correctly (it tends to take less than a hour, but could be longer)
Step 4 - Setup mail forwarding within Mailgun
Within MailGun go to the Receiving section and click “Create Route”.
Set the “Expression Type” to “match recipient” and then for the recipient enter the exact email address you’d like to have (I’m using example@zainrizvi.io). Ensure the checkbox under “forward” is checked, and enter your gmail address there. Let’s pretend my gmail address is youraddress@gmail.com.
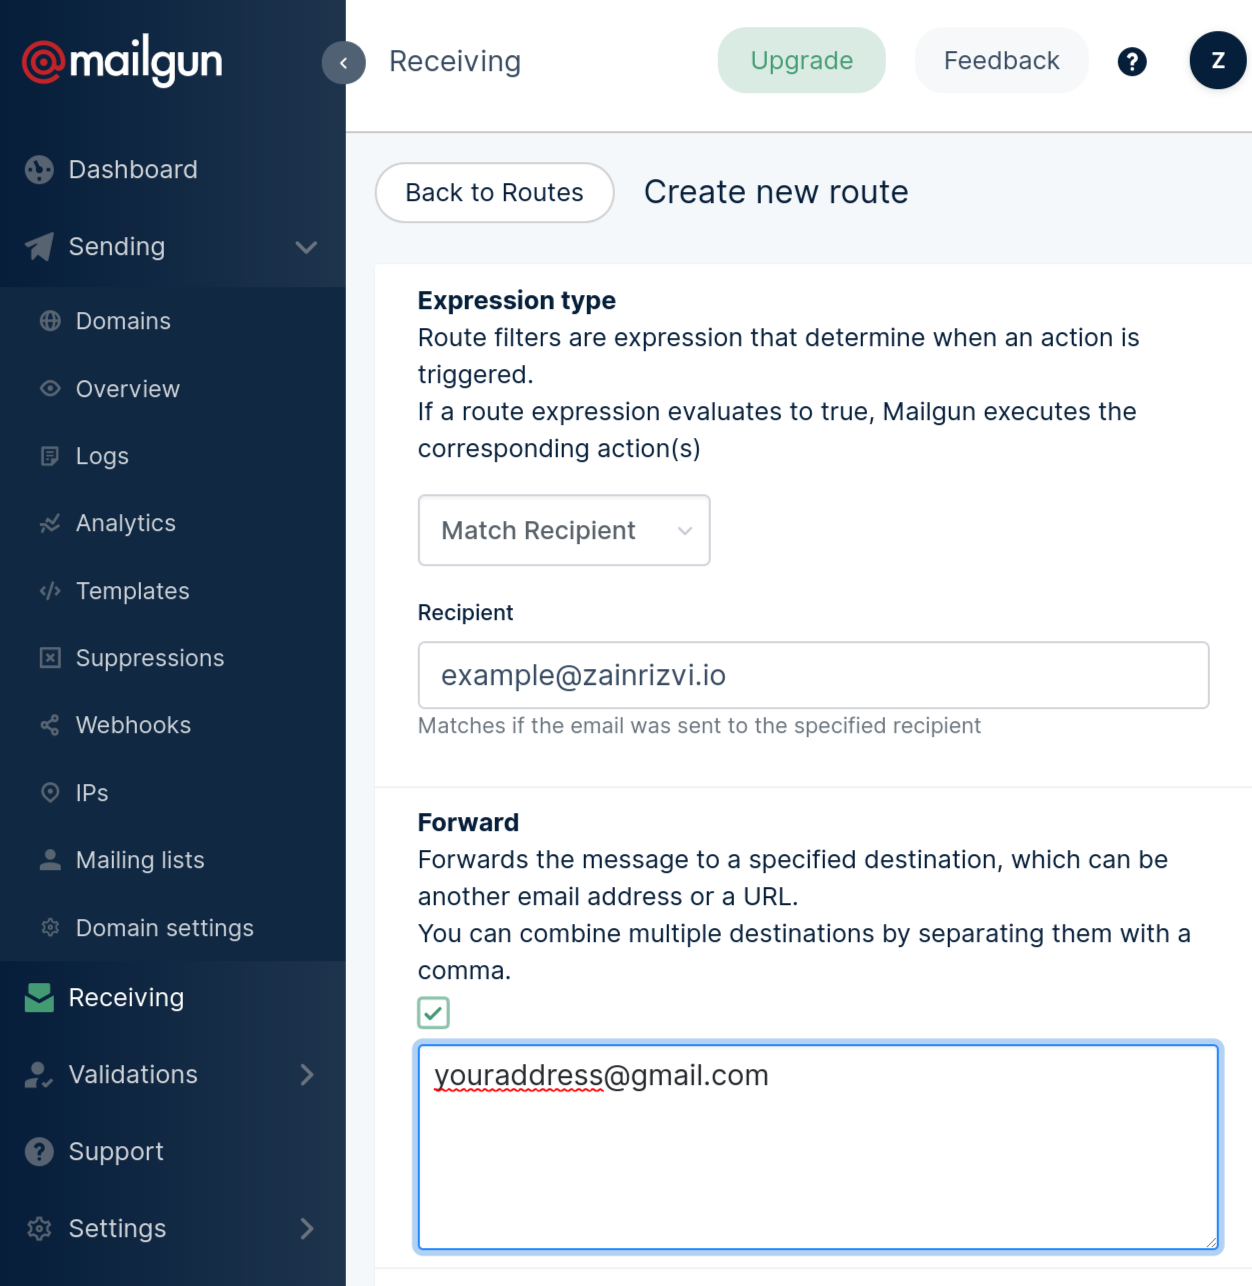
Once you hit save, any emails that get sent to that recipient email address (in this case ‘example@zainrizvi.io’) will get forwarded to your Gmail address.
Now you can receive emails at your custom domain, but if you reply to any email the recipient will see that you’re sending it from your gmail account. We’ll fix that in the next step.
Note: Don’t bother trying to send messages from the same Gmail account that the message is being forwarded to. Gmail tries to be smart and hides any messages you’re sending to yourself. So if you’re testing it out, send the message from a different email address instead.
Step 5 - Tell Gmail to send messages from your custom address
Gmail has this handy feature called “Send Mail As” which we’ll be taking advantage of here.
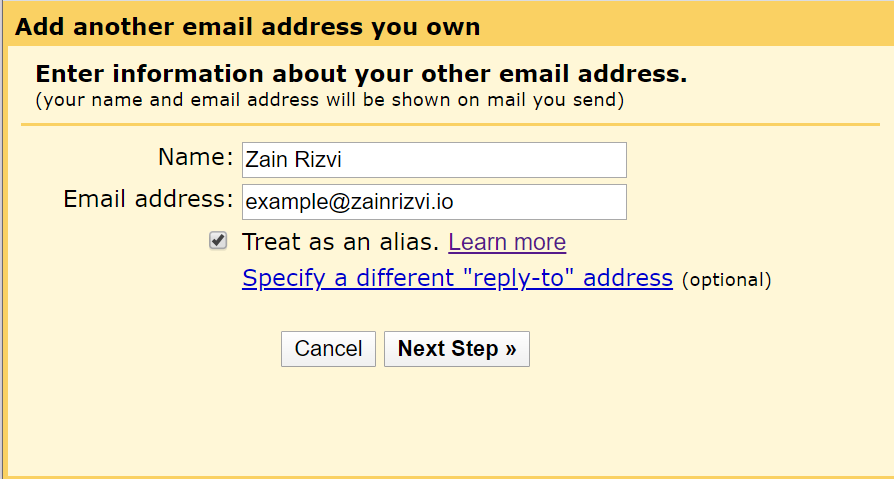
In Gmail, go to Settings -> Accounts and Import -> “Add another email address”
Enter the custom domain email address you created a route for in mailgun and click “Next Step)
The next screen asks you to input your mailgun SMTP credentials.
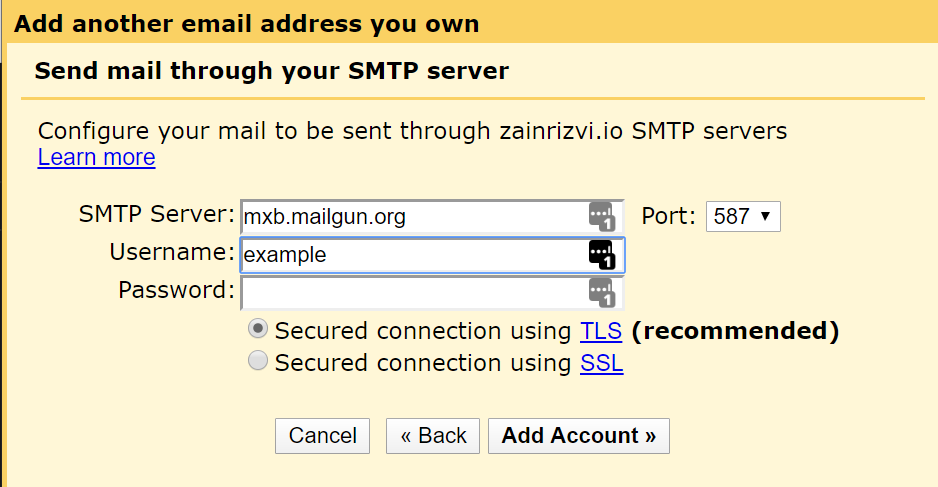
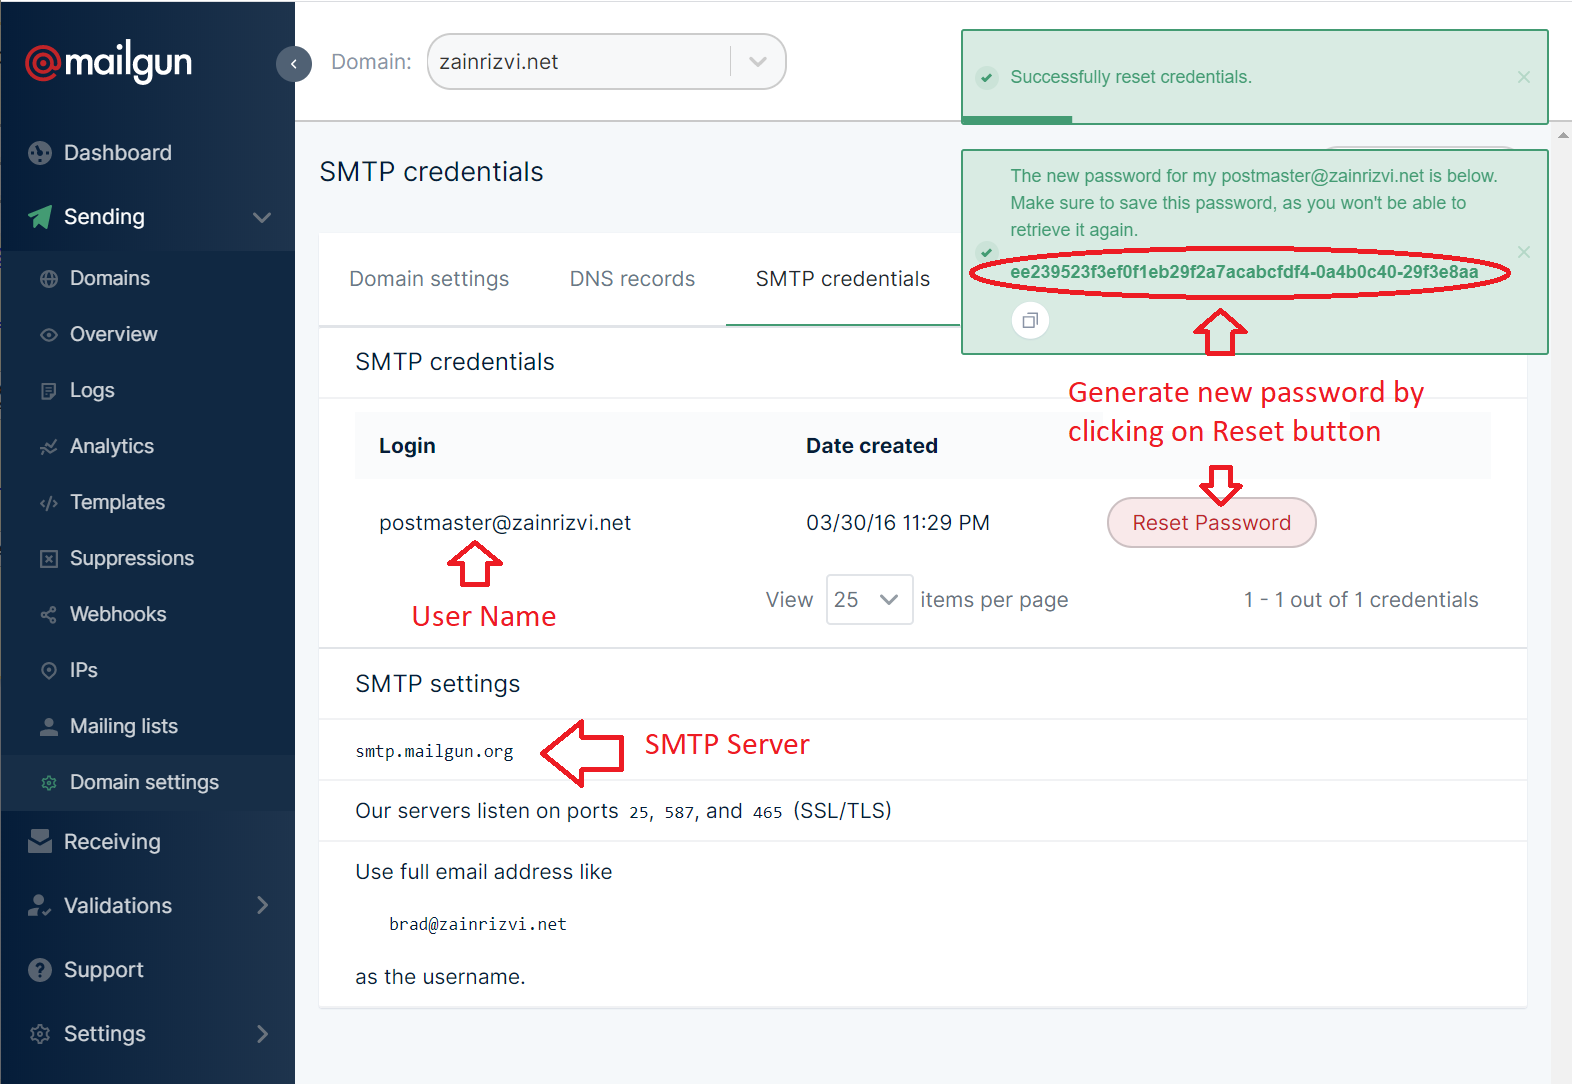
You can get those from mailgun by navigating in Mailgun to Sending -> Domain Settings -> SMTP Credentials, and ensuring you’re using the correct domain from the drop down menu at the top
Click the “Reset Password” button to get a new password which you can let Gmail use to log into the SMTP server. You’ll also find the username and SMTP Server to use on that page
Enter the relevant information into the gmail window and click “Add Account”. Gmail will then send your custom domain email address a message asking to confirm that it’s okay with gmail sending emails on it’s behalf. Since you’ve already set up email forwarding, that email will land right in your gmail inbox :)
Click the link to confirm and you’ll now be able to send messages using your custom address.
As a final step, if you want to make this new email address the mail one you use, go back go Gmail -> Settings -> Accounts and Imports -> Send Mail As. Find your new email address in that list and click on the “make default” button.
All emails you send will now be sent via your custom domain instead!
And Enjoy!
You’re done! Now you’ve added email to your custom domain at no additional cost, and you get to keep using the wonderful Gmail interface.
The One Caveat…
There is one caveat with this setup: In the unlikely event Mailgun ever decides to charge for their route forwarding or SMTP server you would suddenly have to pay to keep this going. However, there are other online services which make a similar setup possible for free, so you could always move to them. Some of the ones folks have pointed out to me are:
- Zoho (shared by Pēteris Caune)
- Privateemail.com (shared by Eric Turner)
- Yandex.com (shared by May)
If you know of any other services which make a similar setup possible let me know and I’ll add it to the list above!
Did you find this post useful? I’d love to hear it! Drop a comment below or send me a message at my-first-name @ zainrizvi.io.