Using Virtual Environments has become a standard best practice in the Python community. They allow you to work on multiple python projects at the same time, without one accidentally corrupting the dependencies of another. While using these Virtual Environments has become the norm with Python projects, they haven’t yet caught on in Python notebooks. However, they’re easy to add to your Jupyter Notebook or Jupyter Lab setup. This post will describe just how you can use them.
What will this enable you to do?
By following these steps, you can have multiple notebooks running on the same machine in Jupyter Lab, where each notebook uses own versions of potentially conflicting python packages.
We’ll do this by creating an isolated python virtual environment for each notebook, so that each notebooks runs inside it’s own environment.
If you’re using Google’s AI Platform Notebooks, the scripts below will allow you to keep using the awesome deep learning packages that come pre-installed on them, while isolating each of your notebooks from any new packages you install for any other notebook.
Why does it matter?
Benefit from established Python best practices! Having each project in a separate virtual environment is an existing best practice for python projects, so it seems logical to extend this behavior to python notebooks as well. Of course, this will only apply to Python notebooks and not notebooks using other languages
How do you set it up?
First you’ll need a Jupyter Lab notebook environment. If you don’t have one already you can quickly create one us Google Cloud’s AI Platform Notebooks
Go to your Jupyter Lab notebook and in it’s terminal enter the following (replacing “myenv” with whatever name you want to give your environment):
# You only need to run this command once per-VM
sudo apt-get install python3-venv -y

# The rest of theses steps should be run every time you create
#  a new notebook (and want a virutal environment for it)

cd the/directory/your/notebook/will/be/in

# Create the virtual environment
# The '--system-site-packages' flag allows the python packages
#  we installed by default to remain accessible in the virtual
#  environment.  It's best to use this flag if you're doing this
#  on AI Platform Notebooks so that you keep all the pre-baked
#  goodness
python3 -m venv myenv --system-site-packages
source myenv/bin/activate #activate the virtual env

# Register this env with jupyter lab. It’ll now show up in the
#  launcher & kernels list once you refresh the page
python -m ipykernel install --user --name=myenv

# Any python packages you pip install now will persist only in
#  this environment_
deactivate # exit the virtual env
After running the above code, you’ll need to refresh your JupyterLab tab for the changes to be visible
The Results
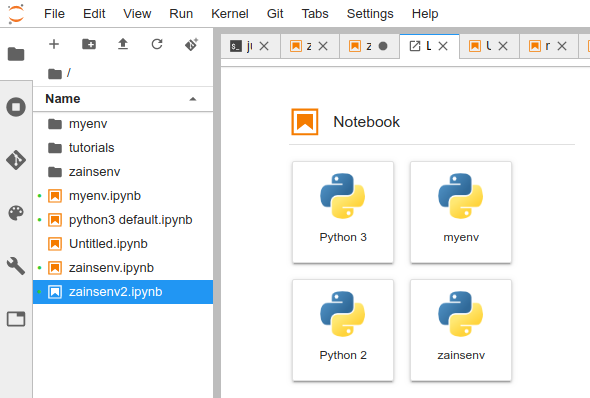
Here’s my launcher after I added two customized environments (“myenv” and “zainsenv”).
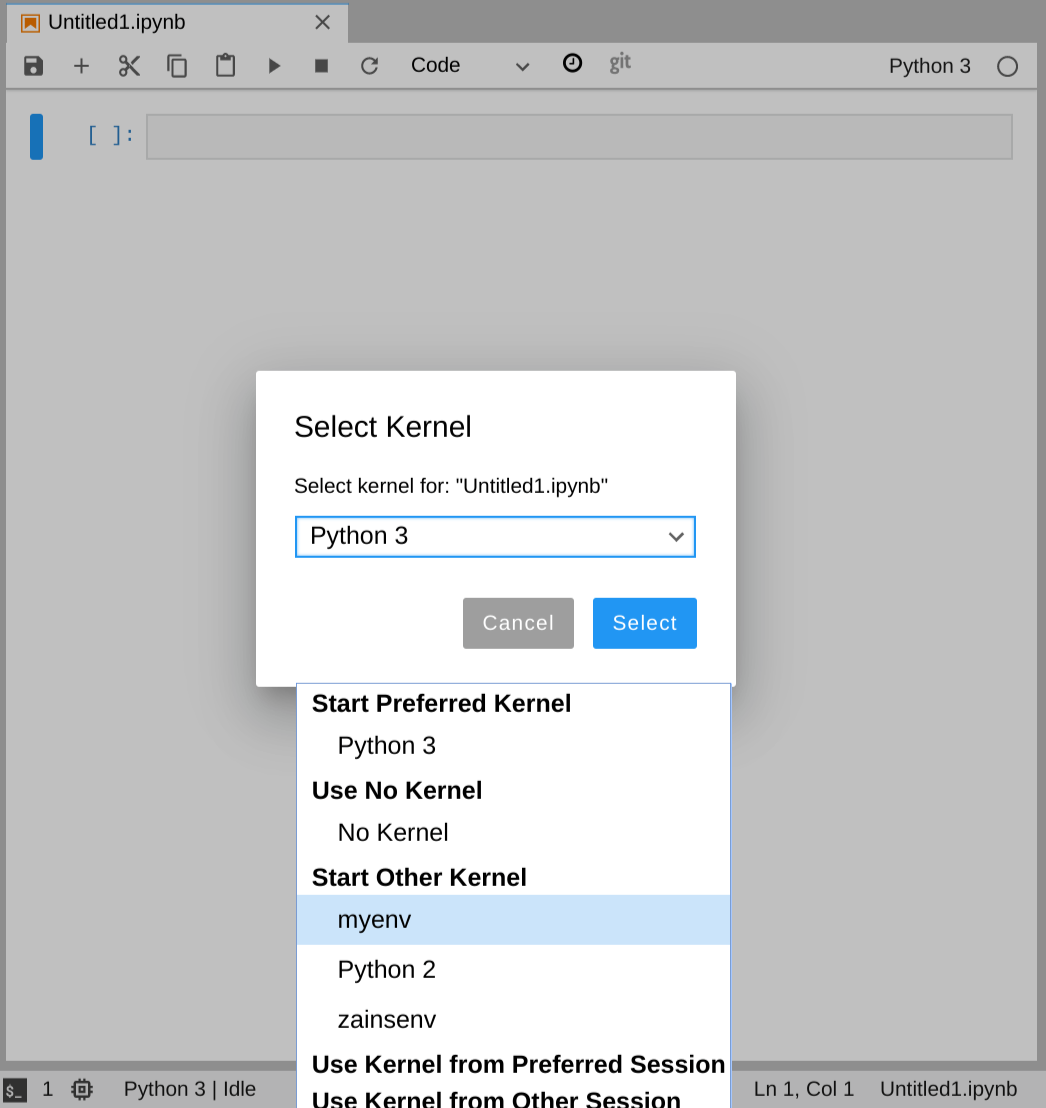
And if you try to switch kernels from within a notebook, you’ll see the virtual environments availalbe as kernels for you to use
See it in Action
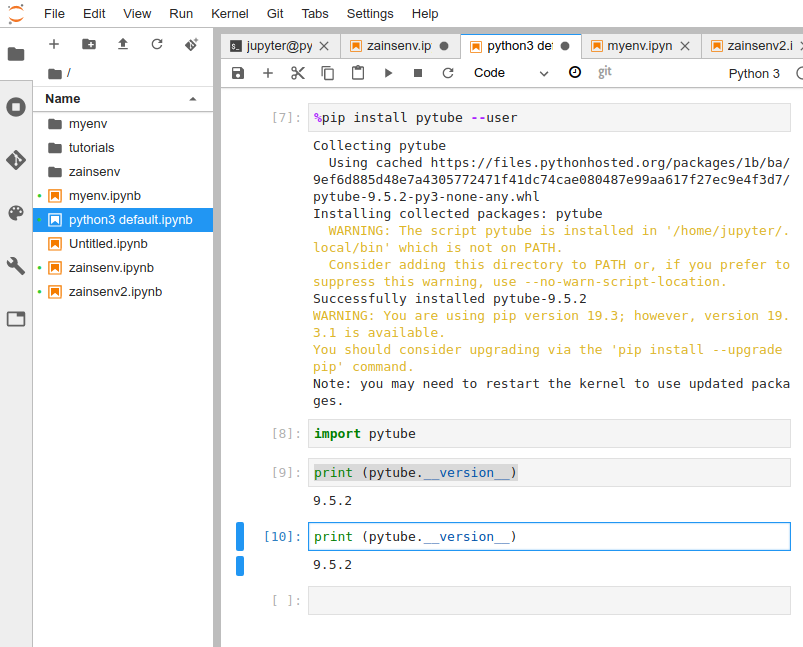
Here you can see I installed the pytube package in one environment
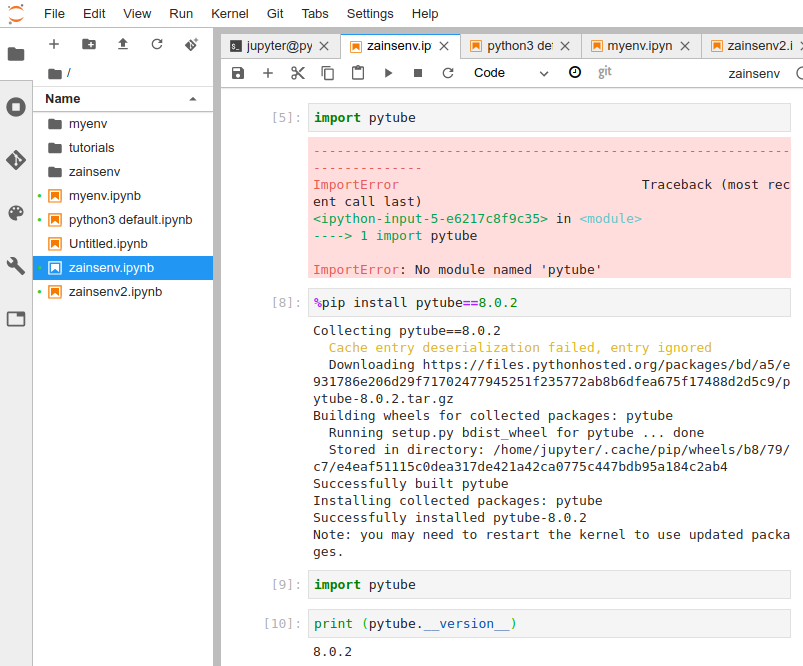
That package was not visible in the other environment. And then when I installed an older version of the same package in the second environment (let’s pretend it needed the older version). The first environment kept using the newer version of the package
And there you have it. You can now create virtual environments on your Jupyter Lab notebooks
Interested in creating Conda Environments instead? Nikolai has a pretty nice write-up here, which I also depended on to write the above steps